

A well-organised loft is easier to use when storage reflects how often you need each item. To organise a boarded loft, keep regularly used belongings near the hatch, place occasional items further back, and label boxes clearly. Leave a route between the entrance and storage areas, and use raised flooring installed above the insulation to preserve its intended depth.
Boxes can accumulate quickly without a clear plan. A simple inventory and well-defined storage zones make it easier to find what you need without shifting everything around.
This guide explains how to sort items by frequency of use, label them, and keep access routes clear. It also covers raised flooring above deep insulation and the checks to make on the loft structure, load and fixing points before planning storage.
Key Takeaways
- Put items you use often near the hatch and less-used belongings further back, while keeping a clear route between storage areas.
- Label boxes by contents and owner so you can find items without moving several containers.
- Keep deep insulation uncompressed by using raised flooring that leaves a gap beneath the boards.
- Before fixing storage in place, consider the loft structure, joists, fixing points and the weight the floor will carry.
1. Planning storage around how often items are used
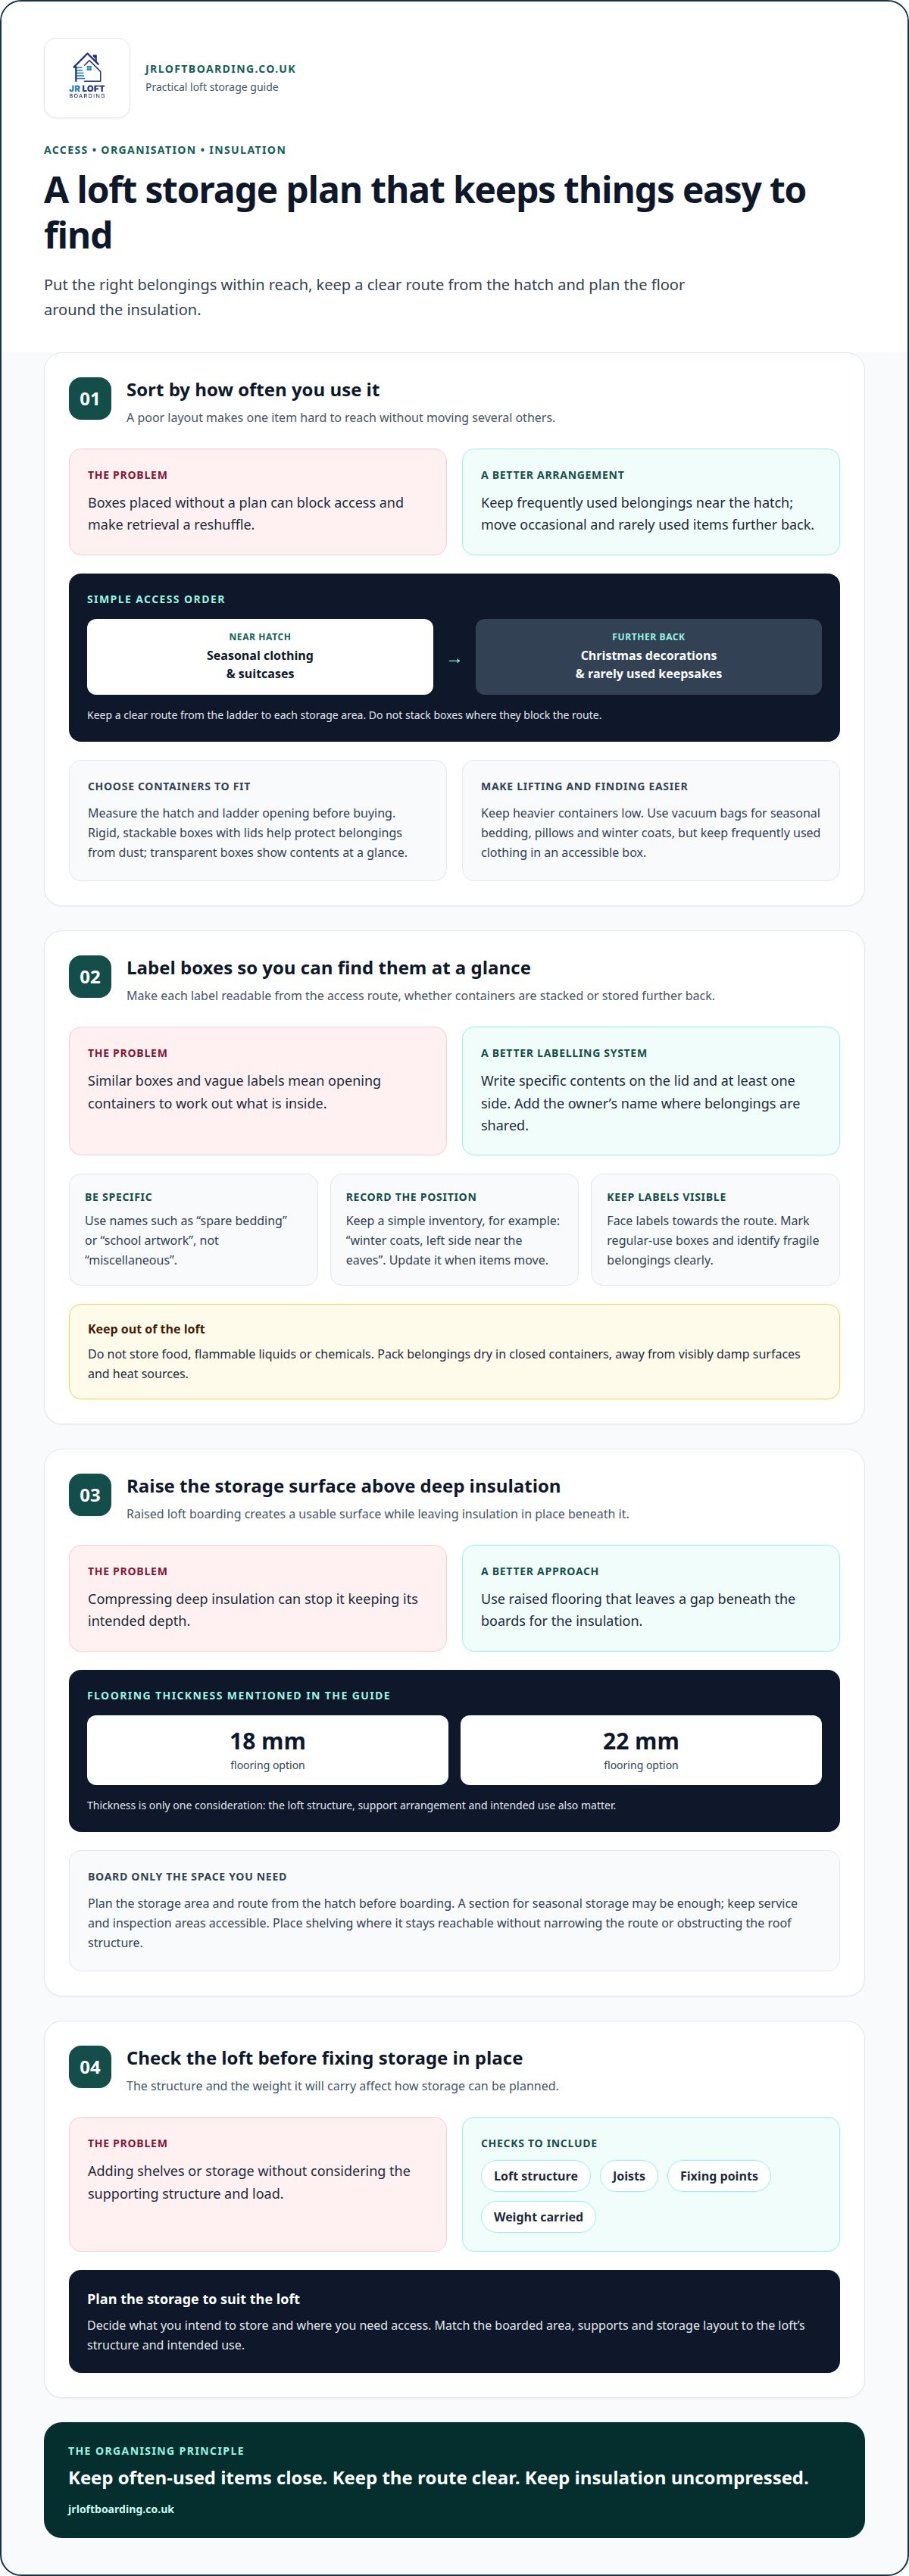
Start with an inventory, then group belongings by how often you use them. Keep seasonal clothing and suitcases near the hatch, where they are easier to reach. Store Christmas decorations towards the back or in a corner, since they are usually needed only once a year. Place rarely used keepsakes further away, but leave a clear route from the ladder to each storage area. That way, retrieving one box does not mean shifting several others.
Choose boxes to suit both their contents and the loft entrance. Measure the hatch and ladder opening before buying, so you can carry each container into the loft safely. Rigid, stackable boxes with lids help protect belongings from dust and make good use of vertical space. Transparent boxes let you see what is inside at a glance. Keep heavier containers low, where they are easier to lift down, and do not stack boxes where they could block the route.
Vacuum storage bags can reduce the space taken up by seasonal duvets, pillows, bedding and winter coats. They suit items that can stay packed until the next season, but make belongings less convenient to retrieve temporarily. Store them further back if you rarely need them. Keep frequently used clothing in an accessible box instead, so you do not need to unpack a compressed bag to find one item.
Lighting helps you read box contents and see the route from the hatch. Suitable loft lighting can make storage areas easier to see. To protect belongings from damp, condensation, heat and pests, pack items dry in closed containers and keep them away from visibly damp surfaces and heat sources. If stored items show signs of damp or pest activity, move them out of that area and address the source before putting them back.
2. Labelling stored items
A clear label saves time when several boxes look alike. Write the contents on the lid and at least one side, so the description stays visible when boxes are stacked. Use specific names such as “spare bedding” or “school artwork” rather than “miscellaneous”. Add the owner’s name when belongings belong to different family members. This makes it easier to find the right box without opening each one.
Use a consistent labelling system throughout the loft. Group containers under headings such as clothing, keepsakes and seasonal items, then add a short list of contents. Mark Christmas decorations clearly, including details such as lights or tree ornaments. Note when a box holds items you use regularly. Place those boxes near the hatch, with labels facing the route, so you can identify them before moving anything.
Record what you have stored and where, either on the label or in a simple written inventory. Note the box description and its position, such as “winter coats, left side near the eaves”. Update the record when you add, remove or relocate belongings. Before labelling a container, sort its contents and set unwanted items aside for reuse, donation or disposal. Keeping only what you intend to use stops old labels from disguising what is inside.
Don’t store food, flammable liquids or chemicals in a loft. Items that can spoil, leak or be affected by heat or damp are better kept elsewhere. Label fragile belongings clearly, then place them where they won’t be crushed by heavier boxes. Keep labels readable from the access route, and avoid storing containers over inspection points. If the hatch makes it difficult to reach or see labels, loft hatch improvements may help make access more practical.
A label identifies the contents of each container and helps everyone find items more easily. When belongings are shared across the loft, add each owner’s name to make it clear whose items are inside and prevent confusion.
3. Raised flooring above deep insulation
Raised loft boarding is installed above the insulation to preserve its intended depth. The raised floor creates a usable storage surface while leaving the insulation in place beneath it. The support system’s height and layout should suit the loft, insulation and area you plan to use for storage.
Decide how much floor space you need before boarding. A clear route from the hatch helps you reach boxes without navigating around shelving or decorations. You may need only a boarded section for seasonal storage, rather than the whole loft. Keep service and inspection areas accessible, and avoid placing shelves where they narrow the main route or obstruct the roof structure.
Loft flooring is available in 18 mm and 22 mm thicknesses. Thickness is one part of choosing flooring; the loft structure, supports and intended use also matter. For example, a section holding light decorations has different storage needs from one regularly used for heavier containers. Plan the storage layout first, then match the flooring and support arrangement to that area.
Shelving can make use of space beside an exterior or adjoining wall, while keeping the centre clear for movement. Place shelves within easy reach and leave enough room to carry items from the hatch. Raised flooring and insulation can also be considered together, so the storage surface and insulation arrangement work with the available loft space.
The right layout for shelving, storage and lighting depends on the loft’s size, layout and intended use. Decide what you plan to store and where you need clear access before choosing how to arrange the space.
A practical plan balances usable storage with open floor space for movement. Choose the boarded area according to what you need to store and the room required to move around comfortably, rather than automatically covering the whole loft. Leaving space clear can reduce clutter and make it easier to reach stored items.
Place shelving where it remains reachable without narrowing the main route or obstructing the roof structure. Considering loft insulation at the same time as boarding can improve energy efficiency and help regulate the home's temperature. Keep the gap beneath the raised boards so the storage surface and insulation can fit together within the available loft space.
4. Checking structure, load and fixing points
Before adding shelves or storage, consider the loft structure and the weight it will carry. Joists, boarding and fixing points all affect how belongings can be stored. A few light seasonal boxes place different demands on a floor from a loaded shelving unit. Plan for the intended contents, not just the empty flooring, and do not assume every boarded area can take the same load.
The roof design also matters. Traditional joists and rafters differ from modern trusses, which can affect where boarding or storage supports can be fitted. Identify the joists and consider the structure’s condition before choosing fixing points. Do not attach shelving to a surface simply because it is easy to reach. Fixings must suit the supporting structure and the planned load.
Map fixed services before placing boxes or shelves. Keep stopcocks, water tanks, junction boxes and electrical or plumbing installations accessible for inspection and maintenance. Leave clear access around these points rather than covering them with permanent storage. Consider insulation, ventilation and fire safety as part of the overall layout, and do not block inspection routes or interfere with the roof structure.
In an existing boarded loft, look for movement, damaged boards or loose fixings before adding weight. These signs do not establish the cause, but indicate that the floor and supports need assessment before use. In a new build, trusses may affect where shelves can go. Consider building regulations before loft boarding work begins, particularly if the planned work changes the structure or its use.
Where the joists, fixings or intended load are unclear, have the arrangement assessed before storing heavy belongings. Discuss raised loft boarding to plan a suitable storage surface around the loft’s structure and access points.
JR Loft Boarding
JR Loft Boarding can help turn your storage plan into a practical loft layout. Raised loft boarding is installed above the insulation, creating storage space while preserving its intended depth. The family-run business also provides loft flooring, insulation and hatch options for established homes and new builds, as well as Easystow aluminium loft ladders to improve access.
Consider professional help if the insulation, loft structure or fixing points make it difficult to plan a suitable boarded area. The right layout depends on the space, access and belongings you intend to store. A clear plan helps keep routes open and makes it easier to reach items without disturbing the rest of the loft.
If you’d like help planning loft storage and access, contact JR Loft Boarding.
Make your loft work for the long term
Give the loft a clear purpose before adding more belongings. Decide which items deserve space, which areas need to stay accessible, and how the arrangement might change as household needs shift. A clear purpose can stop the loft becoming a catch-all again. Review your plan when you bring items down, and consider whether each stored belonging still needs a place there.
Thinking about how to organise a boarded loft is also a chance to consider how the space should work in future. You may want to make access easier, adjust the storage area or plan for different belongings. Note what you want the loft to do and what currently makes that difficult. A clear starting point can make the next decisions more manageable, without needing to settle every detail at once.
If you’d like to discuss your loft plans, contact JR Loft Boarding. A practical plan can help you make better use of the space.
Frequently Asked Questions
What loft storage weight limits should I check before storing items?
There is no single safe weight figure that applies to every boarded loft. The suitable load depends on the joists, roof structure, boarding, supports and how the weight is distributed. Consider the combined weight of containers and their contents, not just the weight of each box alone. Have the floor and fixing arrangement assessed against the intended load before placing dense items, such as books or tools, together.
What are the fire safety and electrical risks of storing items in a loft?
Boxes can obstruct access to electrical installations, making inspection and maintenance harder. Keep junction boxes and other service points reachable, and don’t place stored items against light fittings or equipment that becomes warm. Good lighting can help make loft routes easier to see. Leave ventilation routes clear, and avoid building fixed storage over areas that need inspection.
UK loft insulation and ventilation rules when using a boarded loft for storage
Keep the insulation at its intended depth by using raised flooring installed above it. Consider ventilation when planning the layout, and keep inspection routes clear without interfering with the roof structure.


