

The best loft shelving ideas make use of the space between the roof trusses without blocking access or pressing down insulation. A practical DIY option is to support 18 mm MDF shelves on CLS battens measuring 38 x 63 x 2400 mm, fixed with 70 mm wood screws. Keep shelves shallow where headroom is tight, and use them for lightweight items you can reach safely.
It’s easy to focus on adding shelf space, but a useful loft also needs clear access from the hatch and room to move belongings. These loft shelving ideas cover how to plan storage zones, use restricted headroom and build simple shelves from battens and MDF. You’ll also learn how raised flooring can preserve insulation depth and how to keep stored items organised and accessible.
Key Takeaways
- Choose shelving to suit the roof space and what you plan to store, leaving clearance around loft trusses.
- Make restricted headroom work with shallow shelves, and keep insulation uncompressed beneath raised storage.
- Keep the area around the hatch easy to use by grouping belongings and leaving a clear route through the loft.
- Build simple shelves by measuring the space first, then fixing batten supports securely before laying the shelf boards.
What Are the Best Loft Ideas for Storage?
Choose shelves to suit the roof shape, the items you plan to store and the space you need to move. Under sloping ceilings, truss-mounted ledge shelves and shallow custom shelves can use awkward edges without taking over the central space.
-
Set Shelf Position and Depth
Start by marking possible shelf positions along the trusses, then compare them with the hatch and your planned storage route. Keep shelves shallow near low eaves, where deeper boards can make belongings difficult to reach. Loft ledge truss kits attach to the trusses and create shelf space. Leave 2 cm of clearance, since loft trusses may not all be the same.
-
Adapt Shelves to Sloping Ceilings
Use ledge shelves between trusses or fit boards that follow the roof slope. Check that each shelf sits level on its supports and leaves room to reach items without pushing them against the roof. Open shelves suit lightweight belongings, such as seasonal decorations in small boxes. Avoid filling every gap: shelves that are difficult to reach add little practical storage.
- Decide how much storage you need before adding shelves across the loft. Group belongings by use, such as decorations, spare bedding or archived papers, then reserve shelf space for those categories. In a warm loft, documents, food and wine, paint, wooden furniture and valuable artwork can be stored. In a cold loft, temperature changes, humidity, dust and pests make those items unsuitable.
- Make insulation part of the storage plan. Loft legs attached to new timber battens can raise a floor and create room for thicker insulation below the boards. Where the loft lacks space for the required insulation thickness, timber battens can be fixed to the joists. Insulation should sit between the joists or in the rafters, with thickness meeting current regulations. Wear gloves, goggles and a dust mask when working in the loft.
Storage for small lofts and restricted headroom
For shelf boards, use 18 mm MDF or old doors, with supports suited to the stored load. Building regulations relate to wider building work, so a loft conversion is not simply a shelving project.
-
Choose Materials and Manage Shelf Loads
Store belongings in lidded plastic boxes or vacuum bags to limit dust and protect them. Keep heavy items off open shelves, and don’t assume the loft can take a particular load. Safe storage weight depends on the truss manufacturer and roof condition, so get professional advice before adding heavy belongings. Check shelves for movement, damp, damage and signs of pests during routine inspections.
-
Add Hooks and Rods for Storage
Fit hooks or a rod only where they can be secured to suitable timber, not to insulation or unsupported lining. Use them for light, awkward items such as empty bags or seasonal fabric. Keep eaves ventilation unobstructed, and don’t hang belongings where they could block access or catch on the hatch. Check the fixings when you inspect the shelves, and remove anything that has loosened.
-
Plan Storage for a Loft Conversion
Plan storage alongside the layout if the loft is being converted. Decide where cupboards, shelves and access routes will go before the room is finished, so storage doesn’t obstruct ventilation or usable space. Building regulations apply to conversion work as a broader building project, not just to the choice of shelf material. For a new build, plan storage early to coordinate it with the roof space.
- Protect the insulation when making storage space. Compressing loft insulation can reduce its effectiveness by 50%. Raised boarding on legs or stilts helps keep belongings above insulation. Leave a gap above the recommended 270 mm insulation layer, and keep eaves ventilation clear to help limit condensation and moisture build-up. Lay enough boards for a safe route, and never step directly on joists. For a new-build storage plan, loft storage planning can help make the roof space more practical.
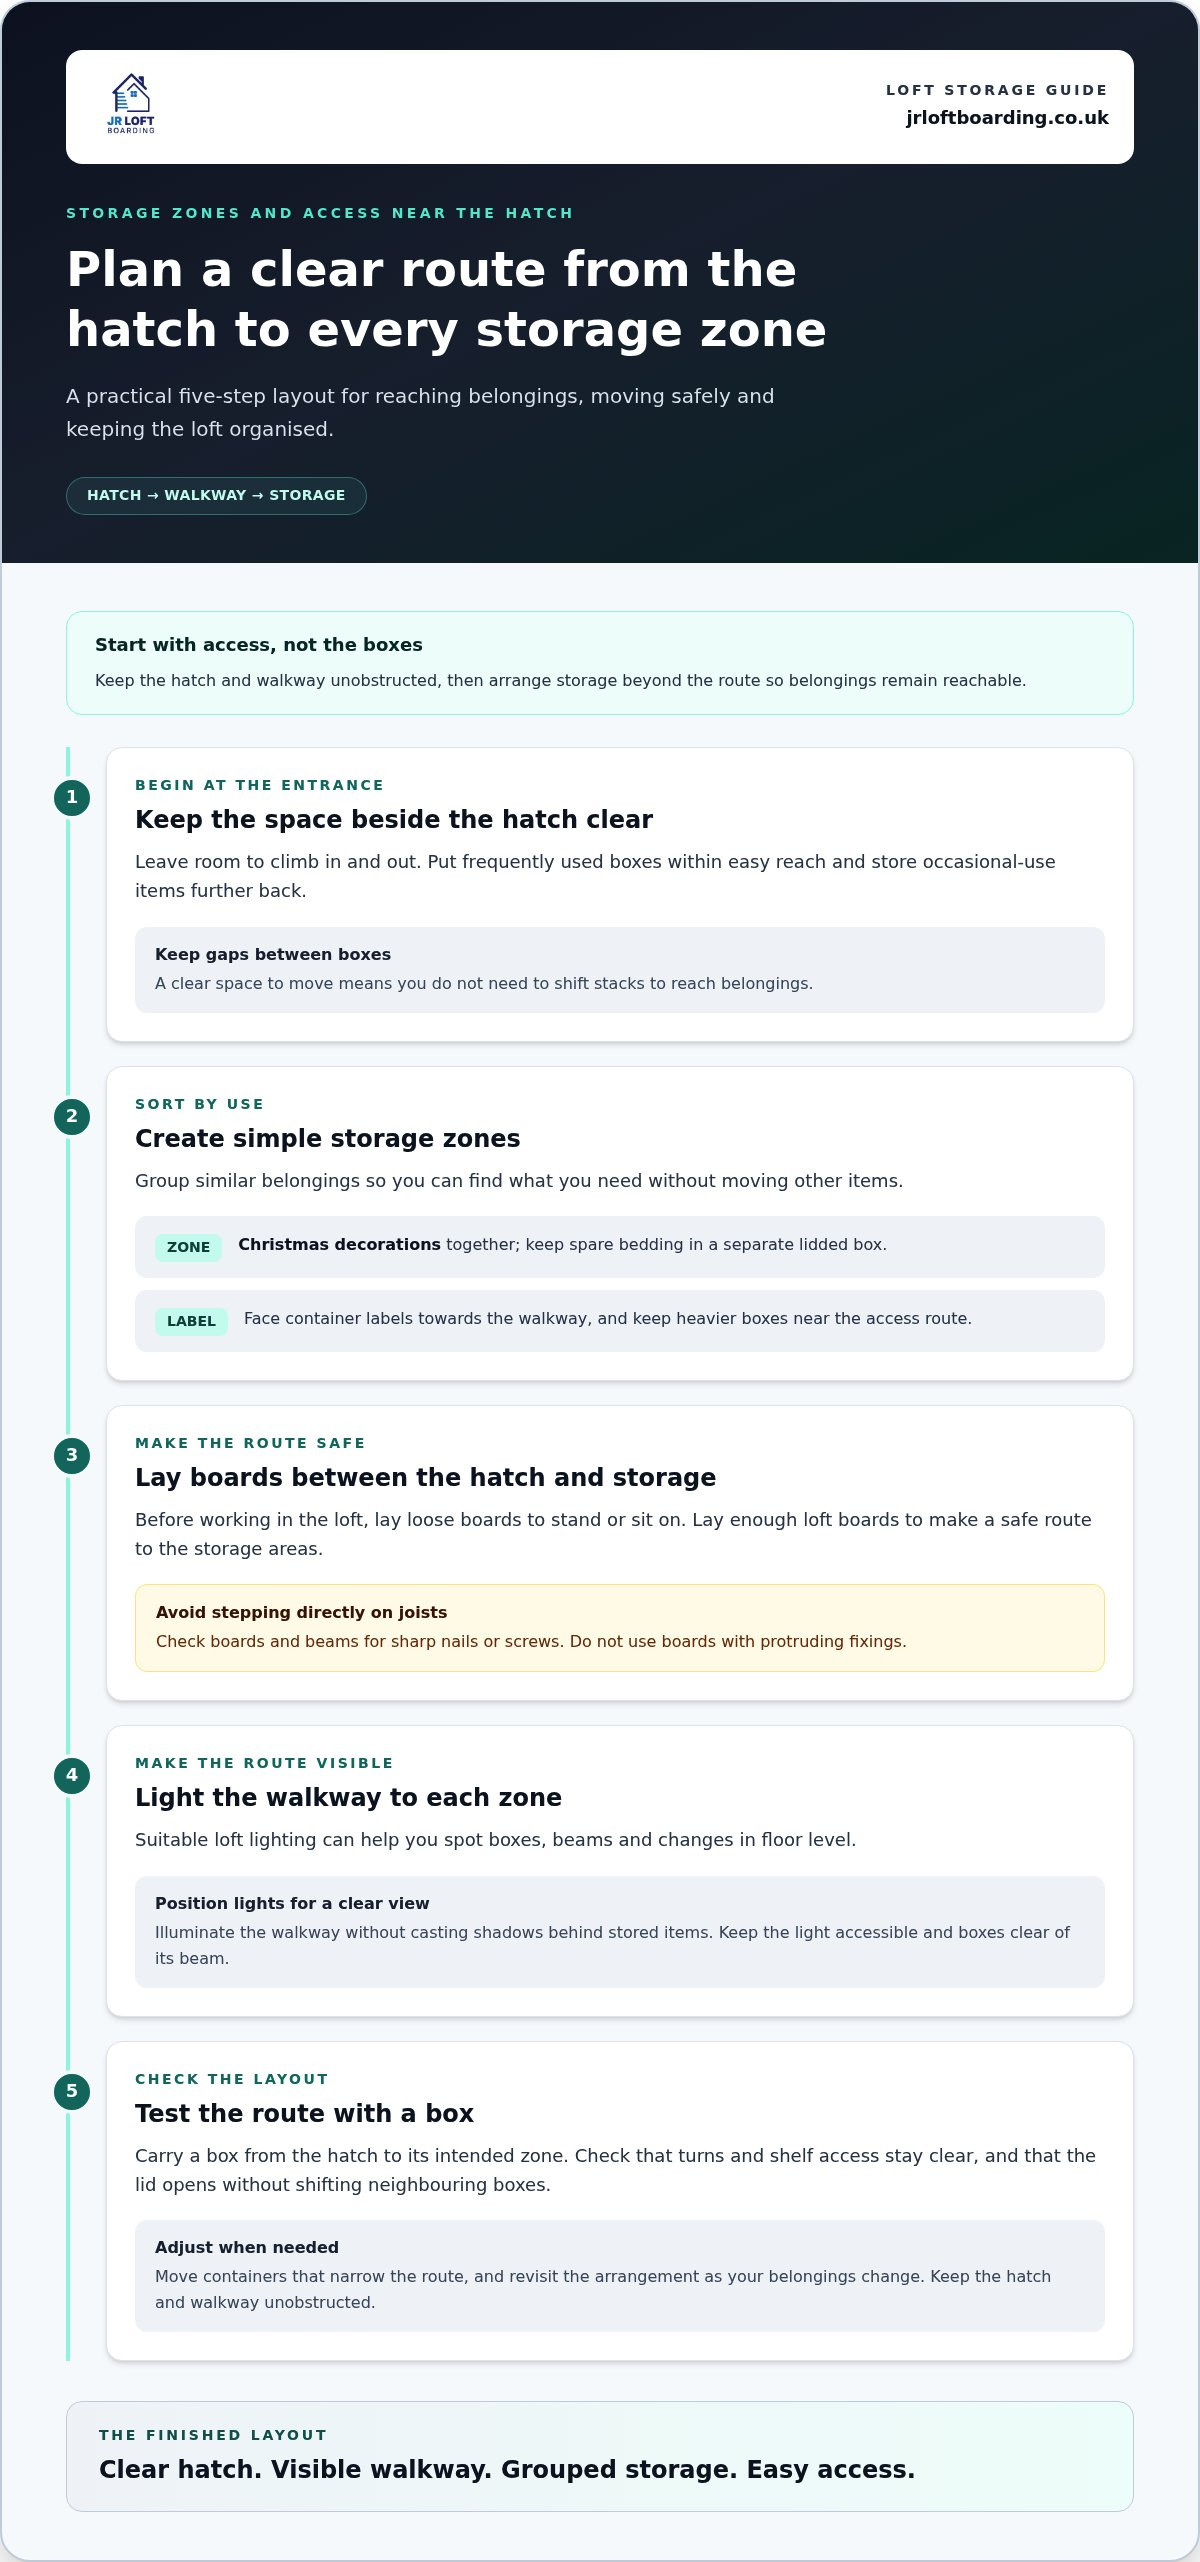
Storage zones and access near the hatch
Plan storage around the hatch first, then arrange boxes and shelves beyond the access route. A clear walkway makes belongings easier to reach and helps you move safely.
- Keep the space beside the hatch clear for climbing in and out. Place frequently used boxes within easy reach, and store occasional items further back. Leave gaps between boxes so you can move without shifting stacks. Don’t fill every available space: an overfilled loft is harder to navigate and organise.
- Create simple zones for different belongings. Group Christmas decorations together, keep spare bedding in a separate lidded box, and label containers on the side facing the walkway. This makes it easier to find items without moving other belongings. Keep heavier boxes near the access route, where you can handle them without reaching across shelves.
- Before working in the loft, lay loose boards to stand or sit on. Don’t step directly on the joists. Lay enough loft boards to make a safe route between the hatch and storage areas. Check boards and beams for sharp nails or screws, and don’t use boards with protruding fixings.
- Make sure you can see the route from the hatch to each storage zone. Suitable loft lighting can help you spot boxes, beams and changes in floor level. Position lights to illuminate the walkway without casting shadows behind stored items. Keep the light accessible, and don’t place boxes where they block its beam.
- Test the layout with a box before storing everything. Carry it from the hatch to its intended zone, then check that turns and shelf access remain clear. Move containers that narrow the route, and make sure lids can open without shifting neighbouring boxes. Revisit the arrangement as your belongings change, keeping the hatch and walkway unobstructed.
DIY loft shelving from battens and MDF
Build a shelf by measuring the available space and fixing supports to sound timber. Adapt these loft shelving ideas to the truss spacing so each board fits without obstructing access.
-
Choose Battens and MDF for Shelves
Measure between the supports before cutting the shelf board. Use 18 mm MDF sheet material or an old door for the shelf surface. CLS battens measuring 38 x 63 x 2400 mm can form the supports. Check the timber and board for damage, then choose a shelf depth that suits the items you plan to store. A shallow board is easier to reach beneath a sloping roof.
-
Anchor Shelves to Walls and Rafters
Mark each support position on solid timber before drilling. Fix the battens with 70 mm wood screws, then check each support is firm. Don’t rely on plasterboard or insulation to hold a shelf. For a wall-mounted shelf, secure supports to its timber framework. Avoid altering structural roof members, and keep each fixing clear of visible cables.
- Before attaching the board, check that the supports line up and sit level. Place the MDF or old door across them, then secure it against sliding. Keep the board within the support edges rather than leaving a long overhang. Check that the finished shelf doesn’t block ventilation or the route from the hatch. This keeps practical storage compatible with the loft’s layout.
- Test the shelf with a light item, such as an empty storage box. Check the board, battens and screws for movement before adding belongings. Keep items lightweight and evenly placed. Don’t use the shelf as a platform or load it with heavy boxes. Include the fixings and shelf surface in your regular loft inspections.
For help planning a more usable loft space, plan your loft flooring.
JR Loft Boarding: Raised loft boarding
JR Loft Boarding installs raised loft boarding to create a practical surface for storing belongings. It can suit a loft where shelves alone don’t provide enough accessible space, or where you want a clear route between the hatch and storage areas. The raised floor sits above the insulation, preserving its intended depth beneath the boarding.
Consider raised boarding when planning storage around restricted headroom, existing shelves or a new build. The hatch and ladder also affect how easily you can reach the boarded area, so plan access alongside the storage layout. The right arrangement depends on the loft’s shape, insulation and intended use.
For help planning a more usable loft, contact JR Loft Boarding.
Make your loft storage plan work for the long term
Before adding another shelf, think about how your storage needs may change. Belongings come and go, so make sure access that works today will remain practical later. Use your loft shelving ideas as a starting point, then consider whether shelves alone provide the space and access you need.
JR Loft Boarding installs raised loft boarding and Easystow aluminium loft ladders, including for new builds. Raised boarding can create a more usable floor area alongside your shelves, while a professionally fitted ladder can make reaching stored items easier. Choose the option that suits your home and how you use the space.
If you’d like to discuss a practical storage layout, contact JR Loft Boarding. A considered plan can help you make better use of the loft, one useful improvement at a time.
Frequently Asked Questions
What are the best shelving ideas for a loft conversion?
For a converted loft, choose shelves that suit the finished room’s shape and intended use. Low cupboards or shallow shelves beneath the eaves can store items without taking up central floor space. In a bedroom, keep everyday belongings within reach; in a study, use shelving for lighter supplies. Plan furniture and storage together so shelves don’t obstruct doors, windows or usable headroom.
How can you maximise storage in a small loft?
Use the less accessible edges of the loft for belongings you rarely need, and reserve easy-to-reach spots for regularly used items. Choose containers that fit between supports rather than forcing oversized boxes into narrow gaps. Label each container clearly and keep a simple note of what is stored where. This helps you find things without unpacking several boxes or shifting the whole arrangement.
How do you build DIY loft shelves step by step?
First, sketch the shelf position and record the space between its supports. Cut the support timber and shelf board to fit, then position them before fixing anything in place. Secure supports to sound structural timber, check they sit level, and attach the board. Test the finished shelf with a light load, then check for movement before storing belongings. Keep the design simple and easy to inspect.
What weight can loft shelves safely hold?
There isn’t one safe weight that applies to every loft shelf. Capacity depends on the roof structure, its condition, the shelf materials and how securely the supports are fixed. A heavy object in one spot places different demands on a shelf than lighter items spread across it. Avoid loading shelves until they bow or move, and get the structure assessed before storing heavy belongings.
What are the safest ways to access and organise loft storage?
Use a stable, properly fitted loft ladder and avoid carrying bulky items that block your view while climbing. Pass awkward belongings up separately, or choose smaller containers that are easier to handle. Keep sharp tools and fragile objects in secure, closed containers away from the hatch opening. Return items to their assigned zones after use, so future trips don’t involve shifting unstable piles.


