

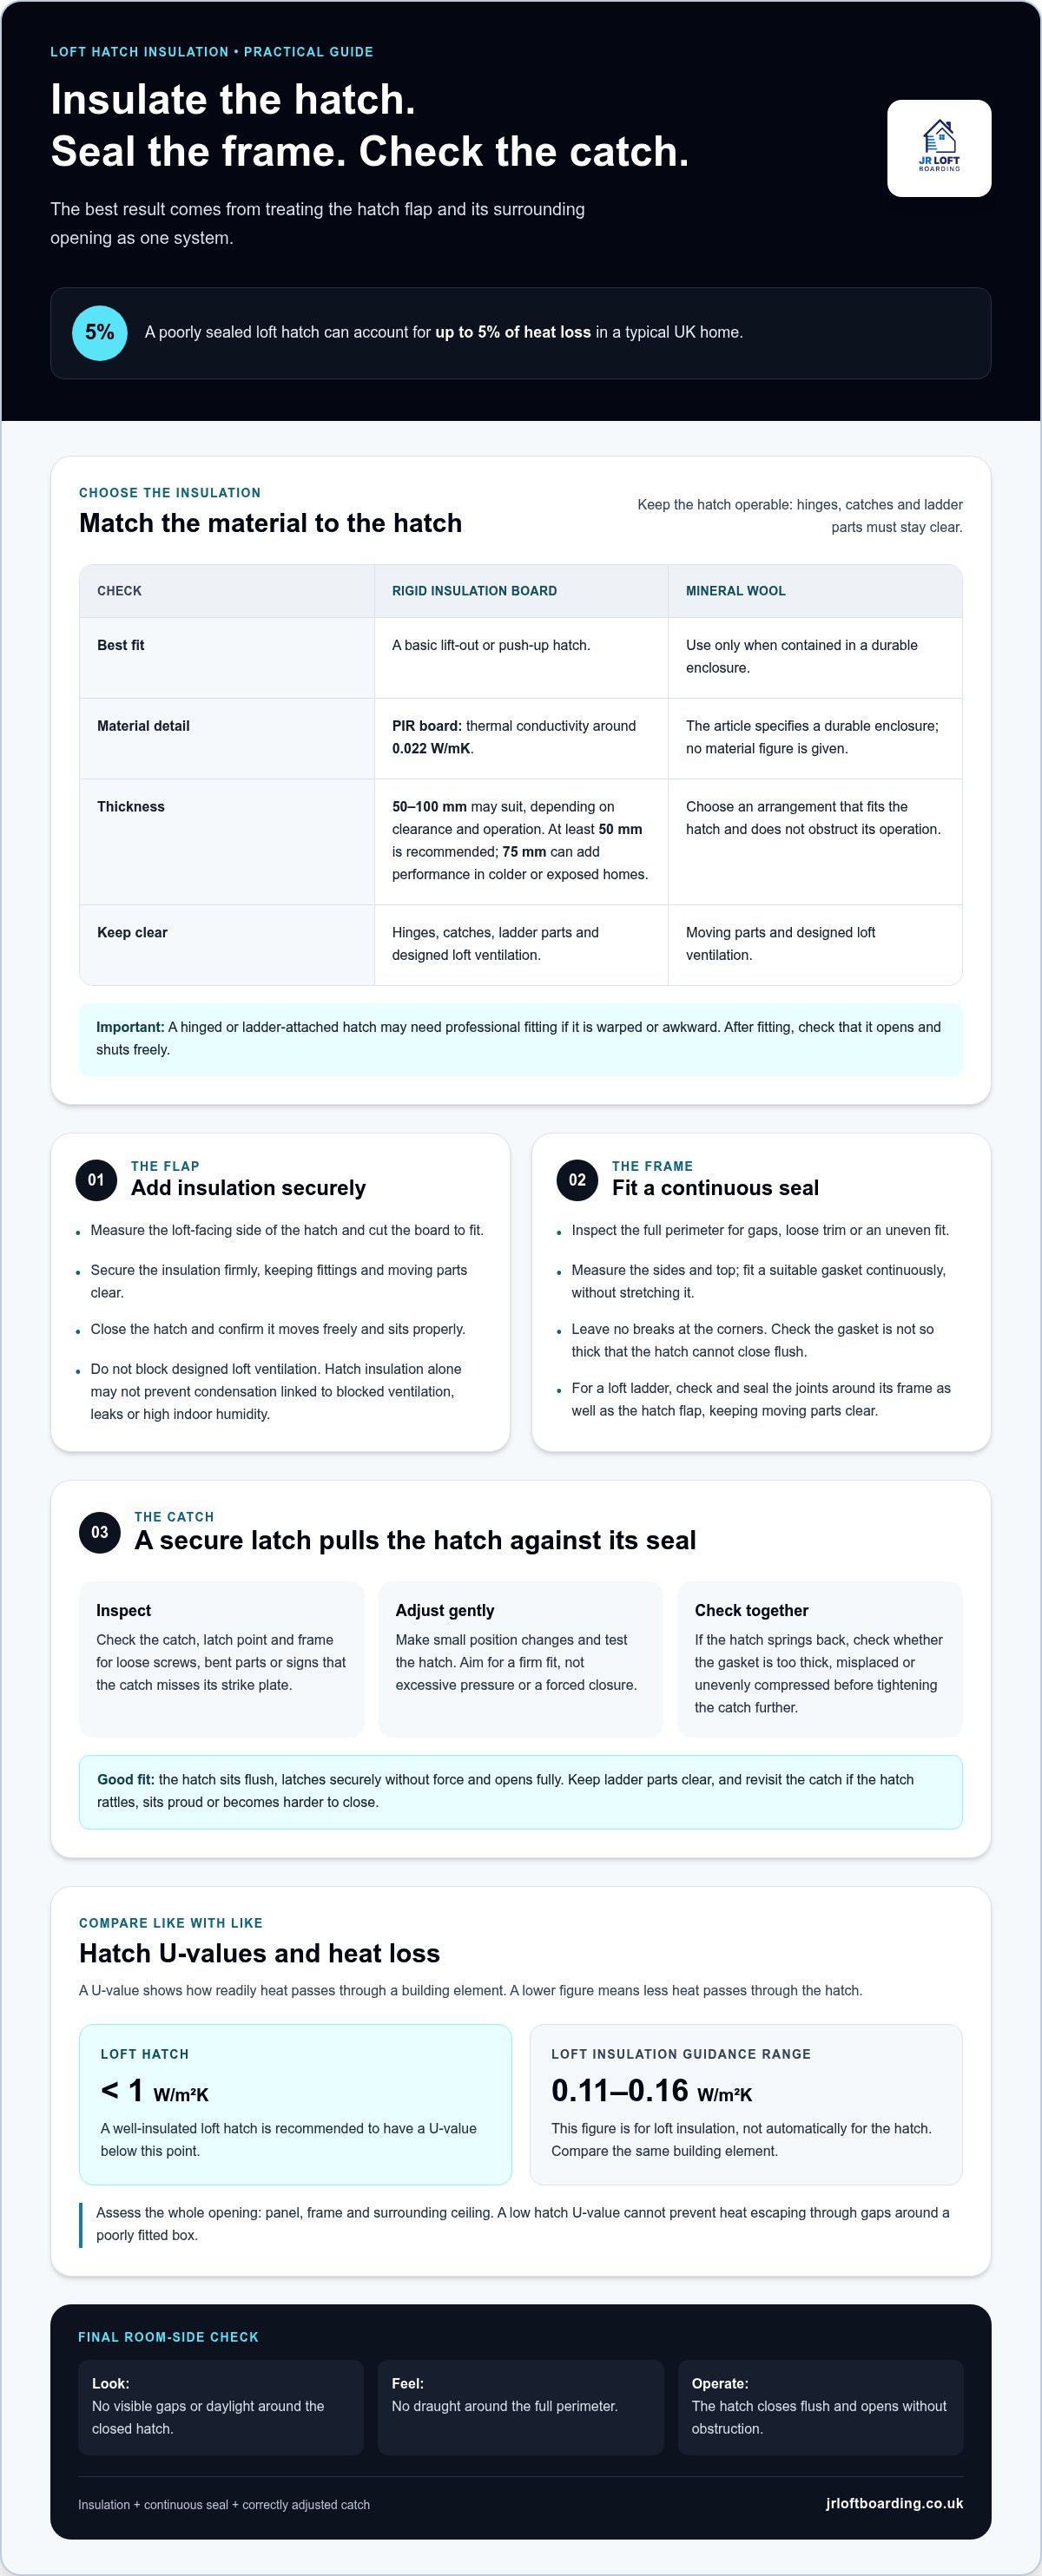
A poorly sealed loft hatch can account for up to 5% of heat loss in a typical UK home. To stop heat loss through a loft hatch, insulate the flap, seal gaps around the frame and adjust the catch so the hatch closes flush. The insulation must still allow the hatch to open and shut properly.
If your loft hatch feels cold or you notice draughts around its edges, check both the insulation and the seal. Adding insulation alone may not help much if air can still pass through gaps or the hatch does not close securely.
This guide explains when to insulate the hatch and how suitable insulation, frame seals and properly fitted catches can reduce heat loss. It also covers hatch U-values, which indicate how readily heat passes between your home and the loft.
Key Takeaways
- Fit rigid insulation to the loft-facing side of a suitable hatch, keeping hinges, catches and ladder parts clear.
- Seal gaps around the frame with a suitable gasket, and check for draughts, cold surfaces or nearby condensation.
- Adjust the catch so the hatch closes flush and latches securely without force.
- Compare hatch U-values when weighing up an upgrade; a lower figure means less heat passes through the hatch.
Should You Insulate Your Loft Hatch?
Yes. Adding an insulation layer to the hatch flap slows heat moving from the room into the loft. To stop heat loss through your loft hatch, pair suitable insulation with a close fit around the frame.
-
Check for signs of poor insulation
Inspect the cover and frame for a cold surface, draughts, gaps or condensation staining. A poorly sealed hatch can account for up to 5% of heat loss in a typical UK home. Notice if the panel feels flimsy, sits unevenly or has become difficult to open. These clues can point to escaping warmth or air leaking around the opening.
-
Choose insulation for the hatch type
Choose rigid insulation board for a basic lift-out or push-up hatch. PIR board has a thermal conductivity of around 0.022 W/mK. A thickness of 50mm to 100mm may suit, depending on clearance and operation. At least 50mm is recommended, whilst 75mm can add performance in colder or exposed homes. Contain mineral wool in a durable enclosure. On hinged hatches or models with a ladder, keep moving parts clear. According to the UK Government, loft insulation work falls under Part L, which covers conservation of fuel and power.
-
Fit insulation to the loft hatch
You can insulate a simple, sound hatch yourself if you can work safely. A warped, awkward or ladder-attached hatch may need professional fitting. Measure the loft-facing flap, cut rigid board to fit, then secure it firmly. Keep hinges, catches and ladder parts clear. Close the hatch and check it moves freely. This helps stop heat loss through a loft hatch without making access difficult. Keep insulation clear of designed loft ventilation. Hatch insulation alone may not prevent condensation caused by blocked roof ventilation, leaks or high indoor humidity.
Draught-proofing around the frame
Even an insulated hatch can let draughts through gaps around its frame. Check the opening methodically, then test the seal.
- Inspect the full frame perimeter for visible gaps, loose trim or places where the hatch sits unevenly. On a windy day, carefully feel around the edges for moving cold air. A draught at one corner may indicate a poor fit rather than a problem with the hatch panel.
- Choose a gasket suited to the contact point between the frame and hatch. Measure the sides and top, then fit the gasket continuously without stretching it. Leave no breaks at the corners, as even small openings can let warm air escape and cold air enter.
- Check that the gasket thickness allows the hatch to close properly. If it is too thick, the panel may not sit flush or may be difficult to open. Close the hatch gently after fitting. It should meet the frame evenly, without extra force or a visible gap.
- If the hatch has an installed loft ladder, check the joints around its frame as well as the hatch flap. Sealing strips can cover gaps around the ladder frame and flap. Fit them neatly and keep moving parts clear so the ladder and hatch work as intended.
- Test the finished seal from inside the room. With the hatch closed, check the full perimeter for daylight and feel for draughts. If air still gets through, locate the exact opening before adding more material. Sealing the wrong area can obstruct the hatch without reducing heat transfer.
A well-fitted seal helps limit warm air escaping and moist air travelling into colder loft areas. If the frame or hatch needs a broader solution, explore loft hatch and insulation options.
Draughtproofing and hatch catches
A sound catch pulls the hatch against its seal, helping to limit draughts. Check the fit after adjusting the catch or sealing the hatch.
- Open the hatch and inspect the catch, latch point and frame. Look for loose screws, bent parts or marks showing where the catch meets the frame. If the catch misses its strike plate, it cannot hold the hatch closed, even when the seal is suitable.
- Close the hatch slowly and watch how it meets the frame. It should sit flush, with no obvious daylight or gaps around the perimeter. The latch should engage securely without forcing the panel or lifting it into place by hand.
- Adjust the catch position if it does not engage cleanly. Make small changes, then open and close the hatch to test the result. Aim for a firm fit against the seal, not excessive pressure that makes the hatch difficult to open or strains its fittings.
- Check the seal and catch together. If the hatch springs back, the gasket may be too thick, misplaced or compressed unevenly. Correct the obstruction before tightening the catch further. The latch should hold the panel steadily, not compensate for a poorly fitted seal.
- Test the hatch from the room below after each adjustment. Open it fully, close it again and confirm it latches without force. If there is a loft ladder, make sure its moving parts remain clear. A secondary upper cover can also help prevent moist air entering the loft and condensing in colder areas.
- Keep the catch accessible for routine checks. Revisit it if the hatch starts rattling, sits slightly proud or becomes harder to close. A correctly fitted catch helps seal the hatch and reduce unwanted heat transfer, while allowing normal access to loft insulation and stored items.
Loft hatch U-values and heat loss
U-values show how readily heat passes through a building element. Read the figure alongside the hatch’s fit and construction.
- Compare hatch U-values, not just the insulation material. A lower figure means less heat passes through the hatch. A well-insulated loft hatch is recommended to have a U-value below 1 W/m2K. Use this as a practical comparison point when considering replacement options.
- Keep product figures in context. The current guidance range for loft insulation U-values is around 0.11 to 0.16 W per metre squared Kelvin. That figure relates to loft insulation, not automatically to the hatch. Check that you’re comparing the same building element.
- Assess the whole opening, including the panel, frame and surrounding ceiling. A low hatch U-value cannot prevent heat escaping through gaps around a poorly fitted box. Insulation around the box and a close fit both support energy efficiency and comfort in the room below.
- Check ladder models separately if the hatch includes a loft ladder. Specialist loft ladders can have U-values as low as 0.28 W/m2K. Compare the stated value with the complete product specification, since the ladder, hatch and frame form part of the route between the room and loft space.
- Use the figures to decide whether adding insulation is enough or a better-fitted hatch is needed. A lower U-value limits heat transfer through the product, whilst sealing addresses air movement around it. Keep insulation clear of moving ladder parts and maintain the loft’s designed ventilation. For a hatch or ladder upgrade, explore insulated loft hatch options.
JR Loft Boarding: Raised loft boarding
JR Loft Boarding installs raised loft boarding, loft hatches and insulation, and Easystow loft ladders. If you’re improving loft access or storage, plan the hatch and ladder alongside the boarding. The hatch still needs a good seal and insulation, while raised boarding is fitted above the insulation to preserve its depth.
This can be a useful option if your existing hatch is awkward to use, or you want to make your loft easier to access and use for storage. In a new build, you can also plan these choices as part of the loft layout. The right setup depends on the hatch opening, access needs and how you intend to use the space.
For help with raised loft boarding or loft hatch and insulation work, contact JR Loft Boarding or visit jrloftboarding.co.uk.
Make your loft easier to use
Once the hatch works well, consider how you want to use the loft day to day. A clear plan brings access, storage and insulation together rather than treating each as a separate job. If your next step is to stop heat loss through a loft hatch, consider whether its position, size or condition also affects access to the space.
JR Loft Boarding installs raised loft boarding and Easystow loft ladders, including for new builds. These options can suit homeowners planning practical loft storage or improving access alongside hatch work. The right setup depends on how you use the loft and what needs to change in your home.
Take a moment to note what’s difficult now, such as reaching the opening or keeping belongings organised. That gives you a useful starting point for discussing the work. Contact JR Loft Boarding today to talk through your loft project and take the next step at your own pace.
Frequently Asked Questions
Should you replace the hatch instead?
Replace the hatch if it is warped, flimsy, unsealed or difficult to use. Insulation cannot fix a panel that no longer closes properly or a damaged frame that leaves persistent gaps. For example, if the catch misses and the cover rocks when shut, replacing the hatch may improve both access and heat retention. Consider the hatch, frame and ladder as one working assembly.
What are the best draught-proof seals for a loft hatch?
Use a continuous gasket suited to the gap between the hatch and frame. The right seal compresses when the hatch closes without stopping it sitting flush or making it difficult to open. Measure the frame and check for breaks at the corners after fitting. If the hatch has an attached ladder, keep the seal clear of moving parts and check that the ladder operates freely.
What loft hatch insulation thickness and U-value should I choose?
At least 50mm of PIR insulation is recommended, and a hatch U-value below 1 W/m2K is a useful target. Check the hatch’s declared U-value rather than assuming the insulation thickness alone tells you its performance. The suitable thickness depends on clearance and how the hatch opens. In a Glasgow home, make sure any added layer still allows the panel to close evenly.
Is it safe to put insulation over a loft hatch?
Yes, if the insulation is secured to the loft-facing side and does not obstruct hinges, catches or ladder parts. Loose mineral wool can shift, snag or compress, so contain it in a durable enclosure rather than leaving it loose on the hatch. After fitting, open and close the hatch to check access. Keep insulation clear of ventilation designed for the loft.
How do you stop draughts around a loft hatch frame?
Find the air path first, then seal the gap between the frame and hatch with a suitable gasket. Check the full perimeter, including corners and the area beside any ladder frame. A secure catch should hold the hatch closed without force. If draughts remain after sealing, inspect the hatch box and its fit within the ceiling opening, as the leak may be beyond the flap.
UK Building Regulations for loft hatch insulation
Loft insulation work in the UK falls under Part L of the Building Regulations, which covers the conservation of fuel and power.


